

DTFX Zones Indicator for NinjaTrader 8
 Created 13 Sep 2024
·
Updated 08 Nov 2024
Created 13 Sep 2024
·
Updated 08 Nov 2024
The DTFX Zones Indicator is a Premium indicator for the NinjaTrader 8 platform, plotting Fibonacci retracement zones based on market structure shifts.
Prerequisites
To properly use this indicator you should have the following prerequisites available.
- NinjaTrader 8, with any license type. Click here to download
- An automated-trading.ch account with an active Premium Subscription
Description
The DTFX Zones indicator shows zones — Fibonacci retracements based on market structure shifts — drawn between valid swing points.
These retracement levels can be used as support or resistance levels to enter and exit trades.
Market structure shifts occur when price breaks a swing level. When that happens, retracement levels can be drawn from the breakout swing back to the swing that originated the breakout leg. Price can revisit those retracement levels and bounce off them to confirm the structure shift.
Trading Strategy Example
Not all DTFX zones are created equal, and not all DTFX zones should be traded.
The indicator displays DTFX zones drawn in green and red for bullish and bearish structure shifts respectively. In a typical session, a few small zones can form first, followed by a larger zone that generates a genuine trading signal.
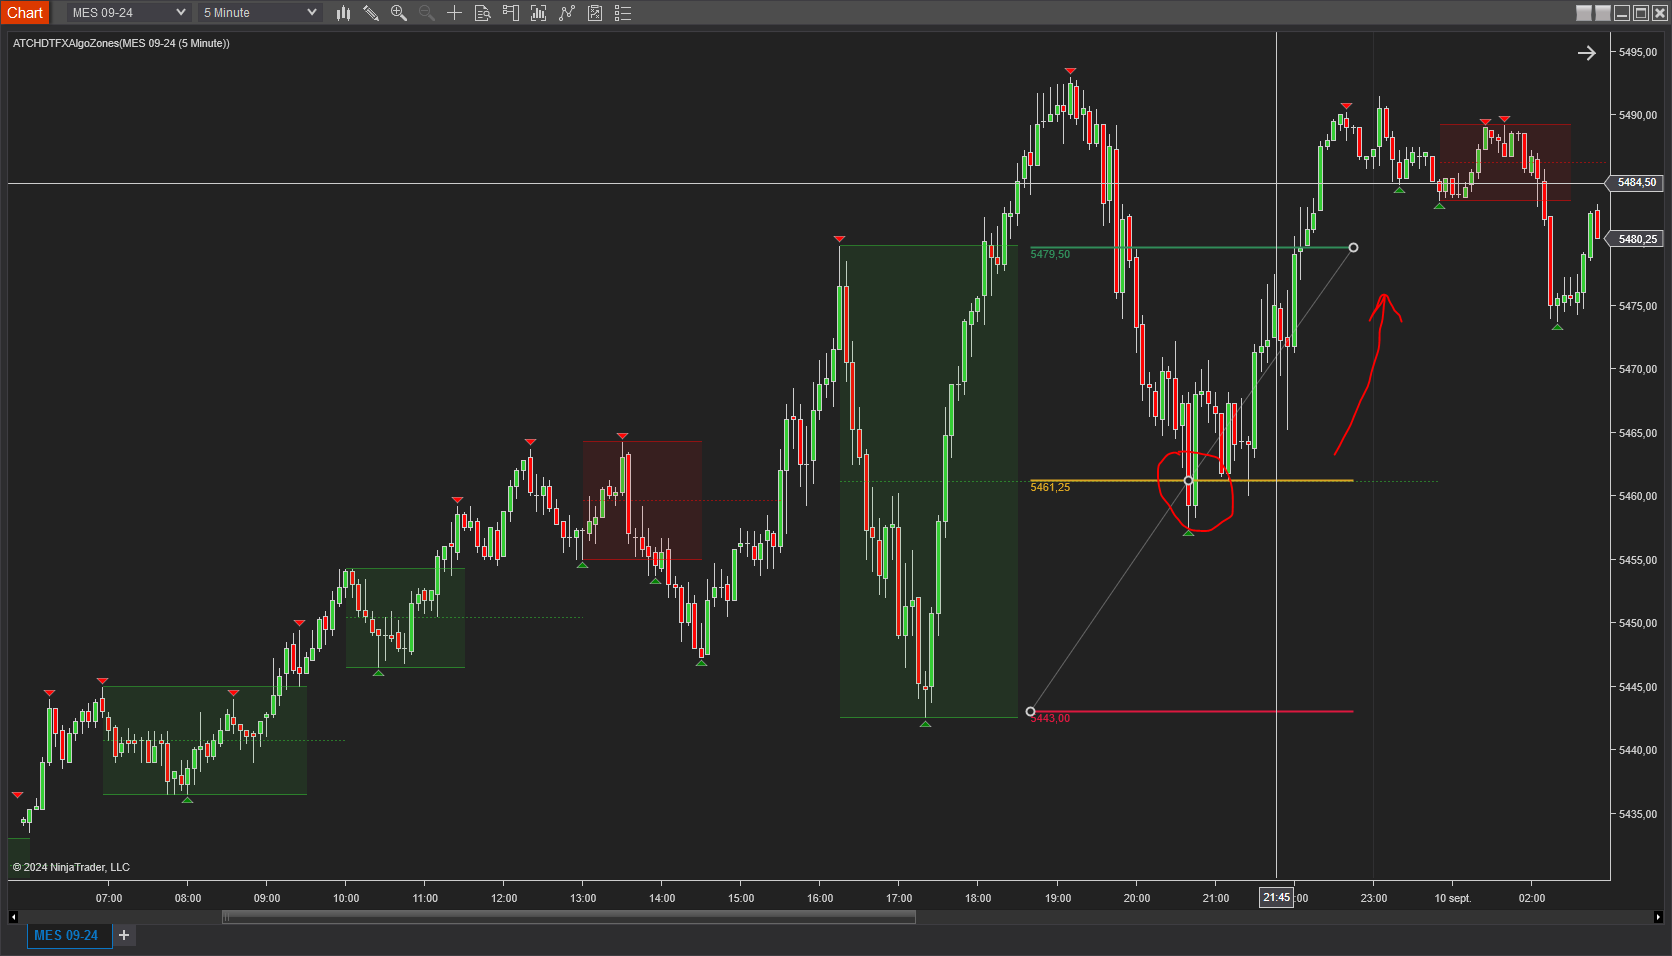
A trade is taken when price revisits the 50% retracement level of the DTFX zone. The stop loss is set to the low of the swing, with the take profit set to a 1:1 ratio measured against the breakout level.
So the strategy is the following:
- Aim for 1 to 2 maximum trades per day
- Wait for a DTFX zone that is wide enough, avoiding small zones — these tend to occur around the US market open and close
- Once a zone forms, wait for price to reach the 50% retracement level and enter once price shows signs of slowing down around that level
- Set your stop loss at the 100% level and your take profit at the 0% level
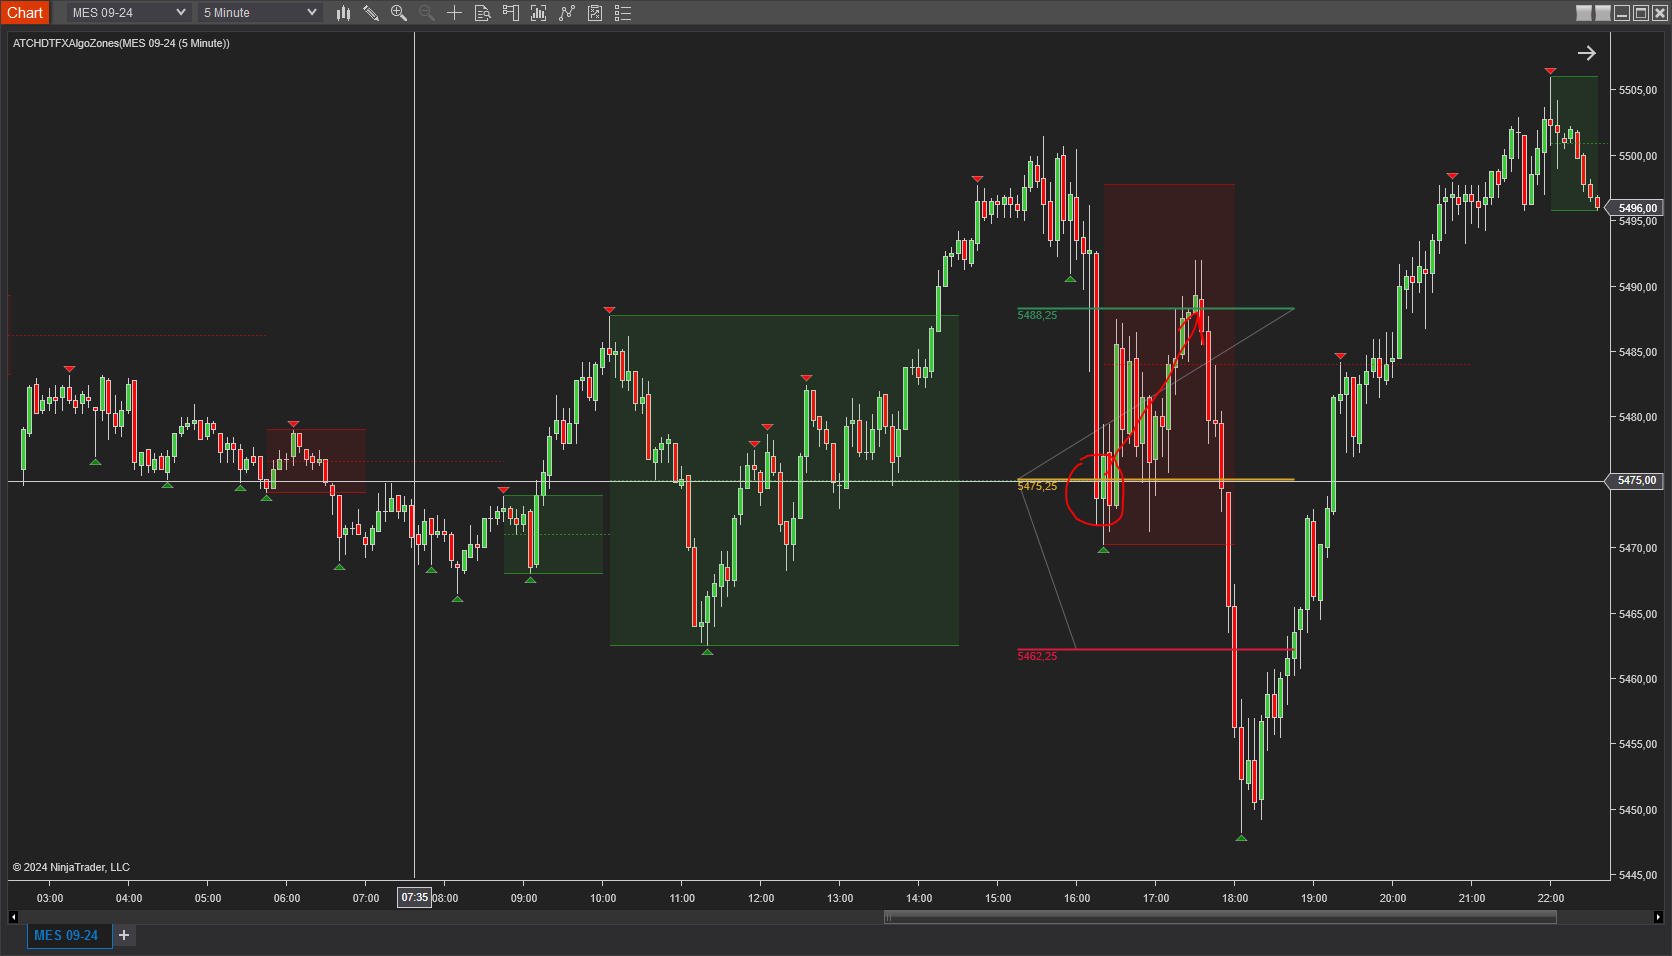
A losing trade can also occur right after a winning one, on the opposite-direction zone that forms immediately after — price pulls back and reaches the 50% retracement level, but instead of reversing, continues straight through to the stop loss at the zone's far edge. Not every zone plays out favorably, which is why zone width and context matter more than trading every zone that appears.
Features
The DTFX Zones indicator has a set of unique features:
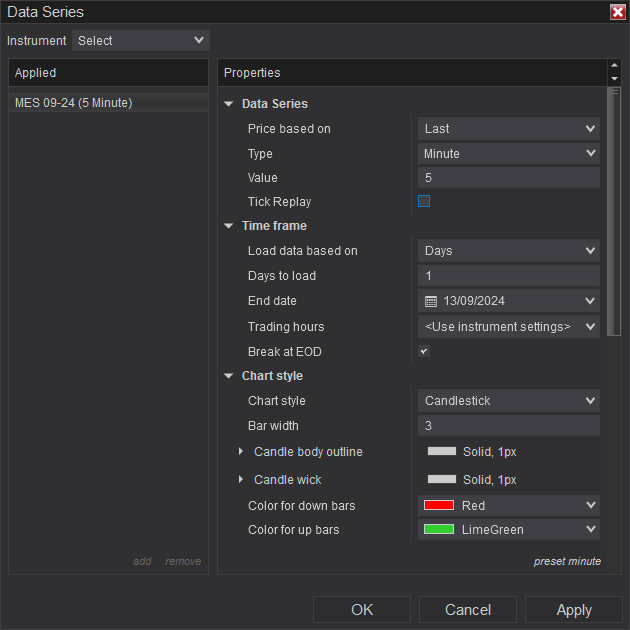
- Can run on a higher timeframe while drawing on a lower timeframe, allowing multi-timeframe analysis
- Can play a sound alert on each detected DTFX zone
- Can run with or without TickReplay, on any time-based or price-based chart
Parameters
We always try to keep the parameters to a minimum.
| License | |
| License | The license key you get when you create an account on automated-trading.ch. After creating an account, copy your license key from the billing page. You only need to set this parameter once per month — once validated, it's remembered for the rest of the month. |
| Market Structure | |
| Swing Period | Swings are higher lows, higher highs, lower highs, and lower lows. After each price bar closes, a swing can be detected, but a following bar can cancel a swing by forming a new swing of the same type shortly after. The swing period sets how many bars must separate two swings of the same type — increasing it decreases the number of swings detected overall, and decreasing it increases them. A value of 3 or 4 works well for most instruments. |
| Confirmation Mode |
Sets the mode that confirms formation of the DTFX zone.
|
| Run On Higher TimeFrame | Enables/disables running the DTFX Zone algorithm on a higher timeframe while displaying the zones on the active chart. |
| Higher TimeFrame | Selects the higher timeframe used when Run On Higher TimeFrame is enabled. Make sure to select a timeframe genuinely higher than the active chart's — e.g. if the chart is on 15 Minutes, select something like 1 Hour. Selecting a lower timeframe (e.g. 1 Minute) will make the indicator not work. |
| Higher TimeFrame Period | Sets the period of the higher timeframe when Run On Higher TimeFrame is enabled. |
| Rendering | |
| Render Opacity | The opacity used to render zones on the chart. |
| Bullish Color | The draw color of bullish zones on the chart. |
| Bearish Color | The draw color of bearish zones on the chart. |
| Show Swings | Controls whether swing points are drawn on the chart. |
| Show Zone Edges | Enables/disables drawing the zone's upper and lower edge lines. |
| Show Fibo Levels | Enables/disables drawing the Fibonacci levels inside the DTFX Zones. |
| Fibo Levels | |
| 23.60 % | Enables drawing of the 23.6% Fibonacci level. |
| 38.20 % | Enables drawing of the 38.2% Fibonacci level. |
| 50 % | Enables drawing of the 50% Fibonacci level. |
| 61.80 % | Enables drawing of the 61.8% Fibonacci level. |
| 76.40 % | Enables drawing of the 76.4% Fibonacci level. |
| Sound Alert | |
| Play Sound | Enables playing an alert sound whenever a DTFX Zone is detected. |
| Play Sound File | The file name played on sound alert — can be set to any .wav file on your computer. |
Download & Installation Instructions
License Requirements
At automated-trading.ch you can choose to either purchase a monthly subscription to use our premium products, or use our free products without subscribing.
In both cases, you need to create an account so you can get a License you can use for both premium and free products.
To obtain your license, simply sign up and then get your license on the billing page.
Download
You can also download this strategy — and every other automated-trading.ch strategy or indicator — anytime from your centralized Downloads page.
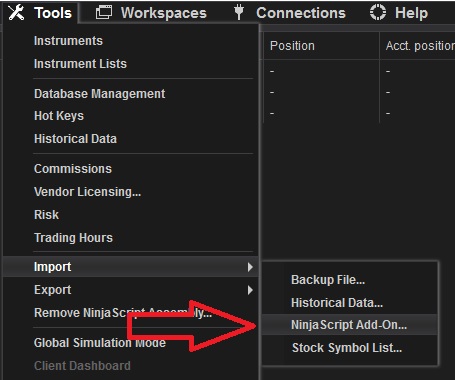
Installation Steps
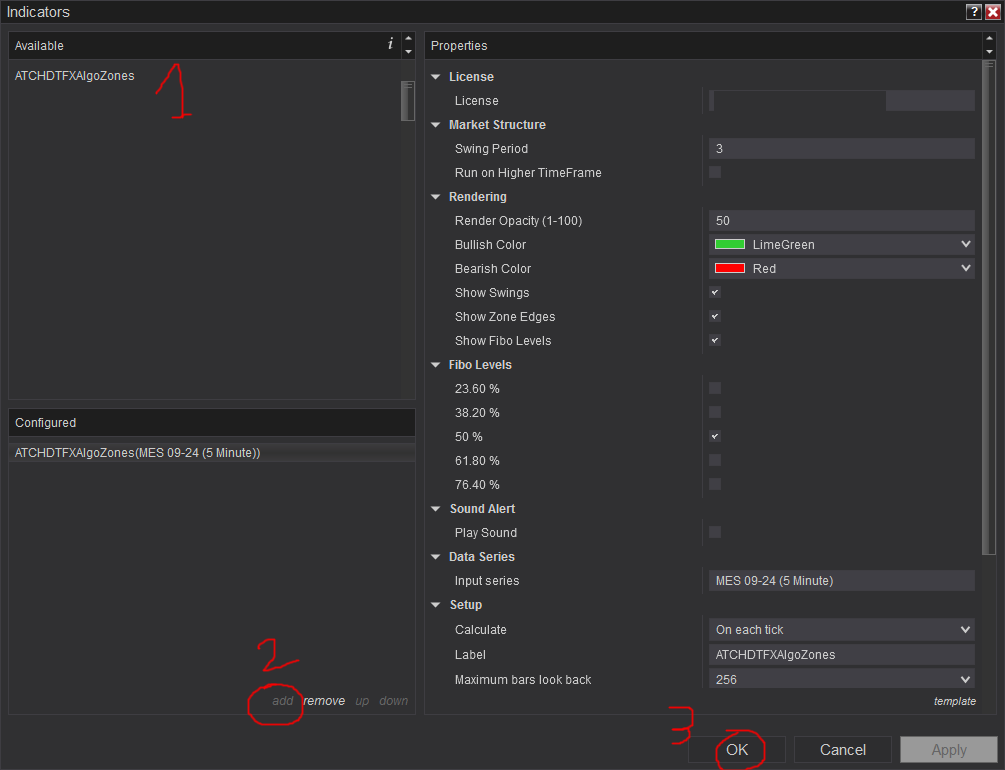
Frequently Asked Questions
General
Subscriptions Q&A
Release Notes
- Added Confirmation Mode parameter
- First Release of the indicator