

Opening Range Breakout Strategy
 Created 13 Sep 2025
·
Updated 11 Oct 2026
Created 13 Sep 2025
·
Updated 11 Oct 2026
The Opening Range Breakout is a Premium mechanical strategy for the Quantower platform. The strategy can be used to pass trader funding programs.
Prerequisites
To properly use this strategy you should have the following prerequisites available.
- Quantower trading platform. Click here to download the platform.
- A free Quantower license.
- An automated-trading.ch account with an active Premium Subscription
- A futures or crypto account to get the data (CQG, Rithmic or Tradovate, Binance, ByBit...).
Important Disclaimer
We strongly recommend that you never run your algorithmic trading systems on your hard-earned real money. You should always minimize your risk and run your strategies on trader funding programs, so the maximum amount you risk losing is the monthly subscription fee you pay those programs.
The Opening Range Breakout strategy is based on entering on a signal generated by analyzing market behaviour in regard to a price range formed around the first minutes of the trading session. The strategy provides a very flexible entry setup based on that breakout concept.
The strategy will start by detecting the opening range — an interval that can be parametrized, but in general terms the opening range should be located around the opening market hour of 09:30 EST for most future market instruments. The opening range can, for example, be defined between 09:30 EST and 09:35 EST (spanning 5 minutes) or from what is known as the Cash Open, from 08:30 EST to 09:30 EST. You should experiment with different intervals and seek the most adapted interval for each instrument.
For crypto markets, the opening of a session is irrelevant since crypto markets are always open, even on weekends — but because of the strong correlation between crypto instruments and US market futures, US market session intervals can still be used to define the opening range interval for crypto markets.
The second step of the strategy is to wait for a breakout of the price from the opening range. The strategy will wait for the price to retest the range as the first required condition before deciding to open a trade. After the retest, the strategy will wait for the price action to show a strong breakout in the direction of the initial retest. Precisely, the strategy will look for a Fair Value Gap that will be the trigger to enter a trade, or the strategy can be set to an immediate mode which will enter a trade at the close of a bar without waiting for a Fair Value Gap to occur. The strategy will also look for these entry conditions to occur before a certain time limit for the day — generally speaking, the longer you wait for the price to break out, the further the price can get from the initial price range, so the default time limit is 11:00 EST, meaning no trades will be triggered after that. This is, of course, a parameter you can modify.
Entering a trade is an important part of any strategy, but what is more important is managing the trade. The strategy allows managing the trade with many methods, including the initial setting of the Stop Loss price, a Take Profit price, and a dynamically set quantity to maintain a fixed risk per trade — a crucial part of any strategy's long-run profitability. The Stop Loss price can be set to Fibonacci levels calculated on the retracement of the opening range zone.
All these steps are configurable and can be enabled/disabled, which makes this strategy very lenient and adaptable to a wide range of scenarios.
Entry Setup Examples
One drawback of Quantower compared to other platforms such as NinjaTrader is that a Quantower strategy can't draw on the chart — only indicators can. This means the strategy analyzes the opening range without being able to draw it for you to visualize; the examples below are hand-annotated to demonstrate the strategy's logic.
Example #1: Entry Setup on MES
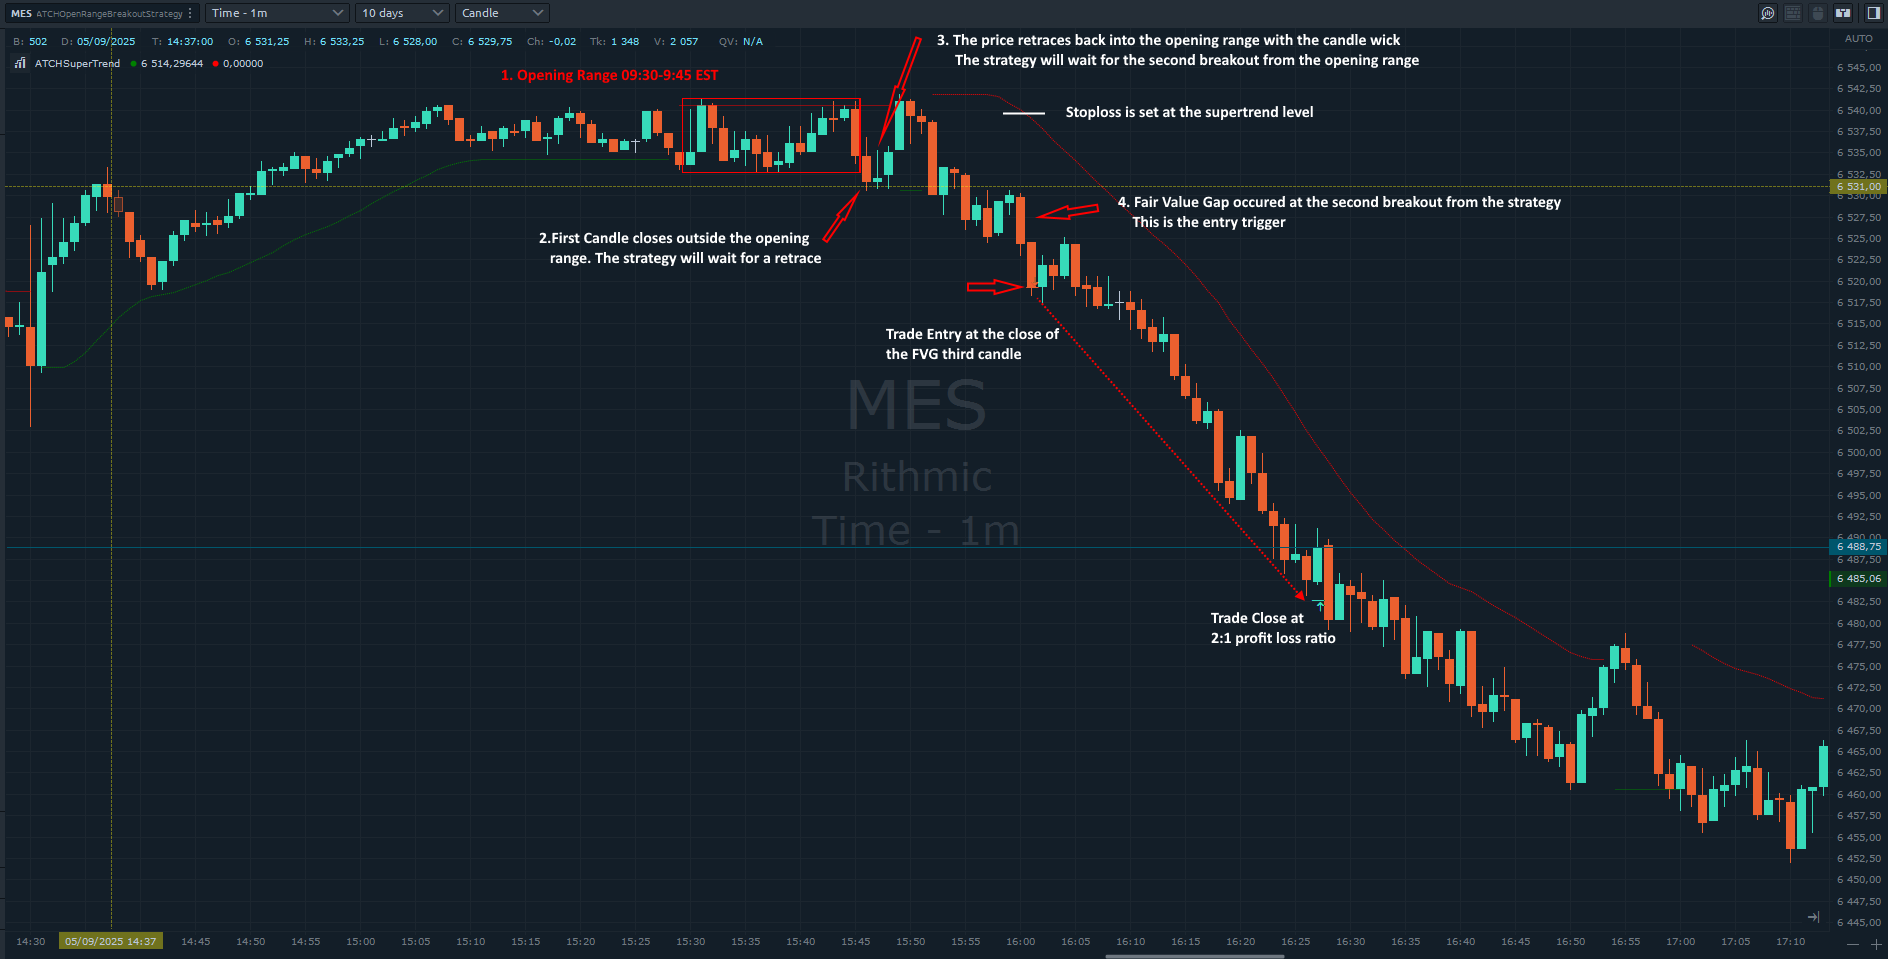
On this example, run on MES on the 1-minute timeframe, the opening range is set to span from 09:30 to 09:45 EST, and a Fair Value Gap is required before entering a trade after price retraces to the opening range, with the stop loss set to the SuperTrend level at entry time. After the opening range finished forming, price broke down from the range — the first required event. The strategy then waited for price to retrace back to the range — the second required condition — before arming for entry and waiting for an FVG to trigger it. The sequence for this example was: (1) first breakout from the range (no FVG required), (2) price retraces back to the range, (3) price breaks out a second time from the range with an FVG. The stop loss was calculated from the SuperTrend indicator, and the take profit used a 2:1 ratio, leading to a winning trade.
Entry Setup Parameters Explanations
Enabling/disabling certain parameters changes these required steps. For example: requiring a candle-close breakout, then a retrace, then a second breakout with an FVG; requiring only a single breakout with an FVG and no retrace at all; requiring a candle-close breakout, a retrace, then a second candle-close breakout with no FVG required; or requiring a candle-close breakout, a retrace, then dispatching entry at the very first tick outside the range.
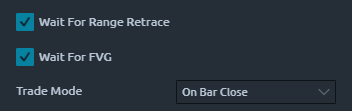
Scenario 1: Requires (1) candle close breakout, (2) price retrace, (3) second breakout with FVG.
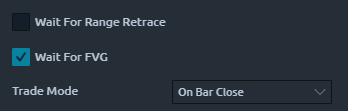
Scenario 2: Requires only single breakout with FVG (no retrace).
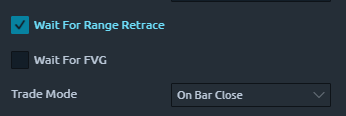
Scenario 3: Requires (1) candle close breakout, (2) retrace, (3) second breakout with candle close (no FVG).
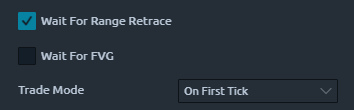
Scenario 4: Requires (1) candle close breakout, (2) retrace, (3) entry on first tick outside range.
Features
The Opening Range Breakout strategy has a set of unique features:
- No pending orders are placed — only market orders
- Full-auto strategy that can be scaled into multiple instances
- Precise backtesting capabilities based on tick-level playback, achieving precise entry/exit backtesting at the tick level
- A robust in-house order management library, resistant to connection loss, working seamlessly on Rithmic accounts or any other connection
Futures on US Indices or Crypto Pairs
The strategy works seamlessly on both US futures instruments such as ES, MES, NQ, MNQ..., or on crypto futures available on popular crypto exchanges such as ByBit or Binance.
Dynamic Quantity and Risk Management
As with all our strategies, this strategy implements two methods for setting the quantity of open positions:
- Fixed Quantity: uses the same quantity for every position. If the stop loss is variable between positions, win/loss amounts will vary too.
- Dynamic Risk-Adjusted Quantity: calculates each position's quantity from its stop loss, the maximum risk (in $) allowed per position, and the maximum allowed quantity — producing equal win/loss amounts across all positions regardless of stop loss width.
Position Management
As with all our strategies, this strategy implements multiple position management methods: a Classical Trailing Stop, which trails the stop loss based on a trigger and a trailing amount, and a SuperTrend method, which manages the position based on the SuperTrend indicator. The strategy also allows setting the stop loss based on multiple methods and the take profit based on various ratio-based methods — see the Parameters section for details.
Account Management
The strategy implements daily stop-trading triggers based on the net winning position count, the net losing position count, or a target realized net profit or net loss.
Parameters
We try to keep the parameters to a minimum — only the most important are exposed.
| License | |
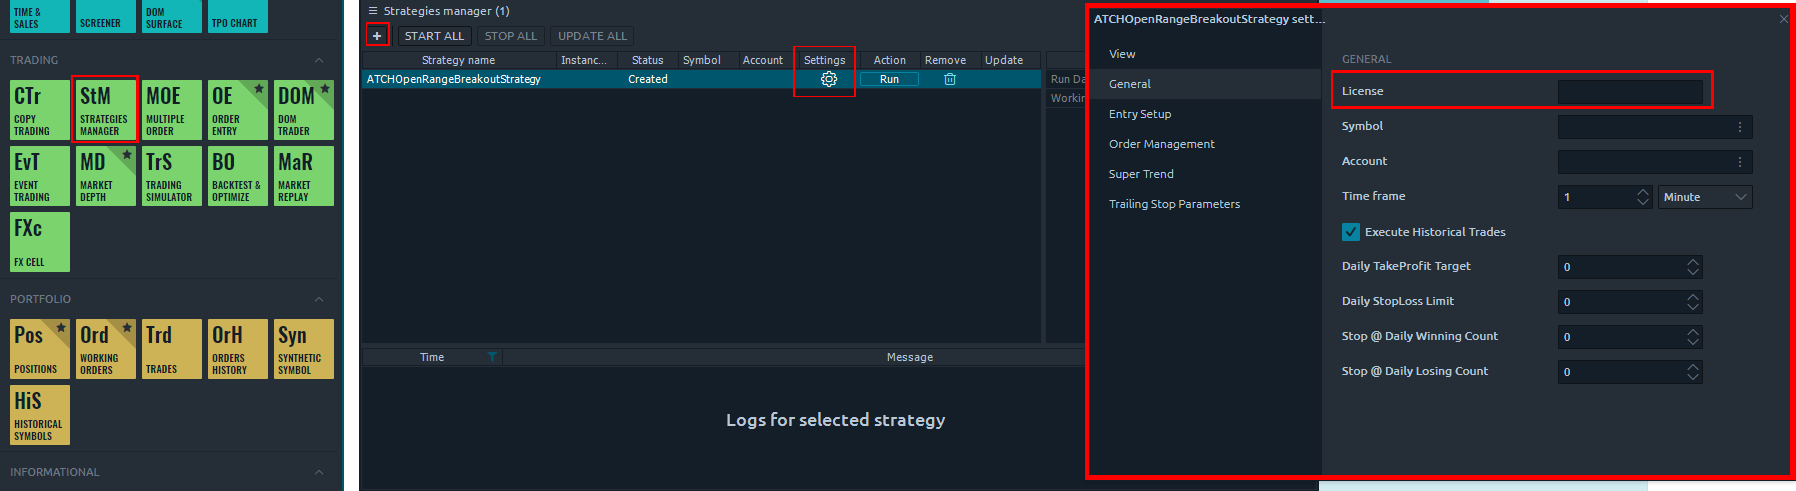
| License | The license key you get when you create an account on automated-trading.ch. Set this parameter only once per month — once validated, it's remembered for the rest of the month. |
| General | |
| Execute Historical Trades | Enables executing trades when the strategy runs in Historical mode — useful to test performance on past days, or to simply verify the parameters will generate trades on the current day. Should be unchecked when running Live. |
| Daily TakeProfit Target | The strategy stops for the day once this daily take-profit amount is reached after a position closes. Ignored when set to 0. |
| Daily StopLoss Limit | The strategy stops for the day once the daily loss limit is reached after a position closes (positive value — e.g. 300 stops trading once realized PnL ≤ -$300). Ignored when set to 0. |
| Stop @ Daily Winning Count | Stops trading for the day once the net winning-trade count reaches this value. Ignored when set to 0. |
| Stop @ Daily Losing Count | Stops trading for the day once the net losing-trade count reaches this value. Ignored when set to 0. |
| Entry Setup | |
| Time Zone |
The time zone used for the Trade Time parameter below. Futures markets operate on US Eastern time (EST), so this lets you specify the trading interval relative to your own machine's time zone instead.
|
| Open Range Time (hh:mm-hh:mm,...) | Sets the opening range interval — e.g. 09:30-09:35. Once the interval ends, the range is drawn on the chart marking its high/low. |
| Start Trading From (hh:mm) | When trading should start after the opening range has formed — usually as soon as it's formed, but sometimes it's useful to wait before the strategy starts trading. |
| Allow Trading Until (hh:mm) | When trading should stop after the opening range has formed. Restricts new trades from opening but doesn't affect already-open positions being managed. |
| Range Offset (Ticks) | Adds an offset in ticks to both the high and low of the calculated opening range. |
| Wait For Range Retrace | Waits for: (1) price breaks from the range, (2) price retraces back and touches the range, (3) price breaks from the range a second time — before entering. |
| Wait For FVG | Waits for a valid Fair Value Gap while breaking from the range (which can occur after the breakout). Without this, the strategy only waits for a bar close in the trade direction. |
| Trade Mode |
Entry mode after a retest of the opening range zone.
|
| Min. Distance From Range (Points) | Minimum required distance from the range to the current price to trigger a trade. 0 means any break from the range can trigger. |
| Max. Distance From Range (Points) | Maximum allowed distance from the range to the current price to trigger a trade. 0 means no distance control. |
| Reset Bias On Each Side |
Only used when Wait For Range Retrace is enabled.
|
| SuperTrend Entry Filter | Restricts long entries to when SuperTrend is bullish and short entries to when it's bearish — fewer trades overall, but filtered by trend. |
| Order Label | A label suffixed to every position sent to the broker, useful to differentiate your orders from other users of the same strategy. |
| Quantity Strategy |
|
| Max Qty | Maximum allowed quantity when Risk Adjusted is selected — useful since some prop firms enforce order-quantity limits that can invalidate an account. |
| Order Qty | Used only when Quantity Strategy is Fixed — the fixed quantity per trade (and per quantity increase, if the order management mechanism scales in). Typically 1 or 2. |
| Order Management | |
| Order Management Strategy |
|
| Target Risk Per Trade ($) | Maximum risk, in dollars, per position — used before opening a trade to verify the calculated stop loss respects this limit; if not, the trade is skipped. |
| Max Allowed Risk Per ($) | Only used with Risk Adjusted quantity — controls how far the real calculated risk is allowed to deviate from the Target Risk (since an exact match is rarely possible). |
| StopLoss Strategy |
|
| TakeProfit Strategy |
|
| Stop Loss Points | Available when the stop loss strategy is set to Points. |
| Stoploss offset Points | Adds an offset, in points, to the calculated stop loss level — used when computing risk per trade. |
| Take Profit Currency | The take-profit amount in dollars, used when the Fixed Currency Value strategy is selected. If not used, set it to a high value so it doesn't interfere with ratio-based strategies. |
| Trailing Stop Parameters | |
| Trailing Stop Strategy |
|
| Trailing Stop Trigger | The trigger (in points or ratio) for the Classic Trail Stop method. |
| Trail Amount | The amount (in points or ratio) trailed once the trigger is hit. |
| SuperTrend | |
| SuperTrend Period / Smooth / Multiplier | Standard SuperTrend calculation parameters — period, smoothing period, and band multiplier (the bigger this parameter, the wider the SuperTrend bands). |
Performance Reports
Past results are not a guarantee of future results. All backtesting results are for indicative purposes only.
- Commissions are included, using the Apex trader funding program's commission schema for US futures and ByBit's for crypto futures, for realistic results.
- We run backtests at the maximum precision available on intrabar granularity, using tick-level data series, and only use market orders — never pending orders — in both real-time and backtest modes.
How to Run Accurate Tick-Level Backtests on Quantower
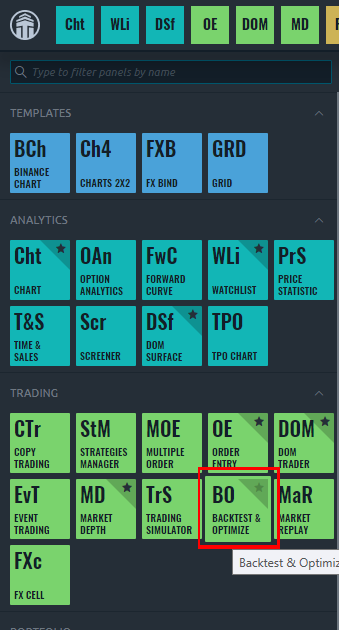
To run backtests on Quantower, first click on the Backtest button as shown below:
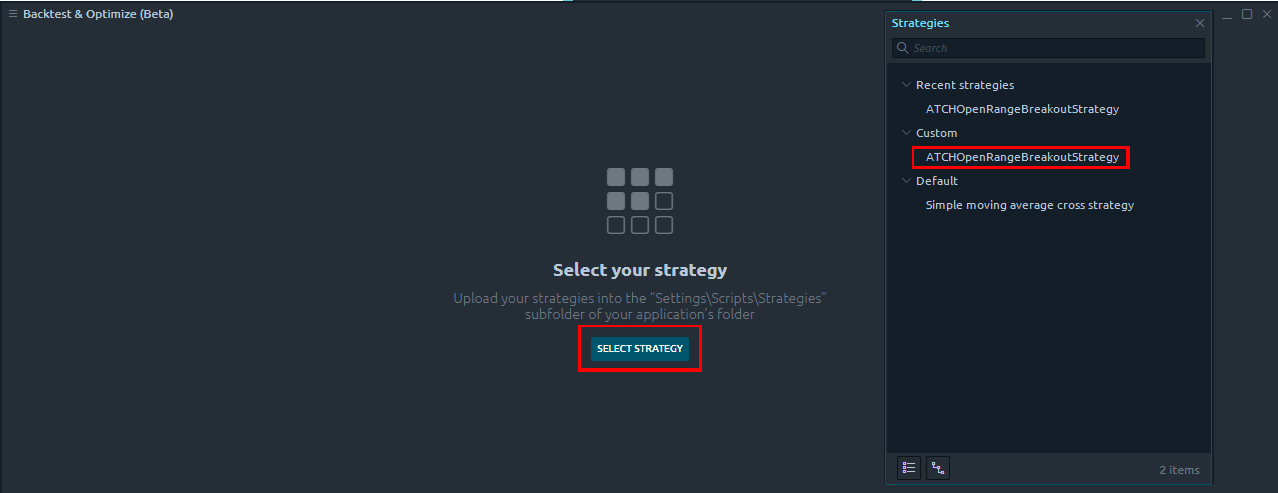
Then select the strategy from the list:
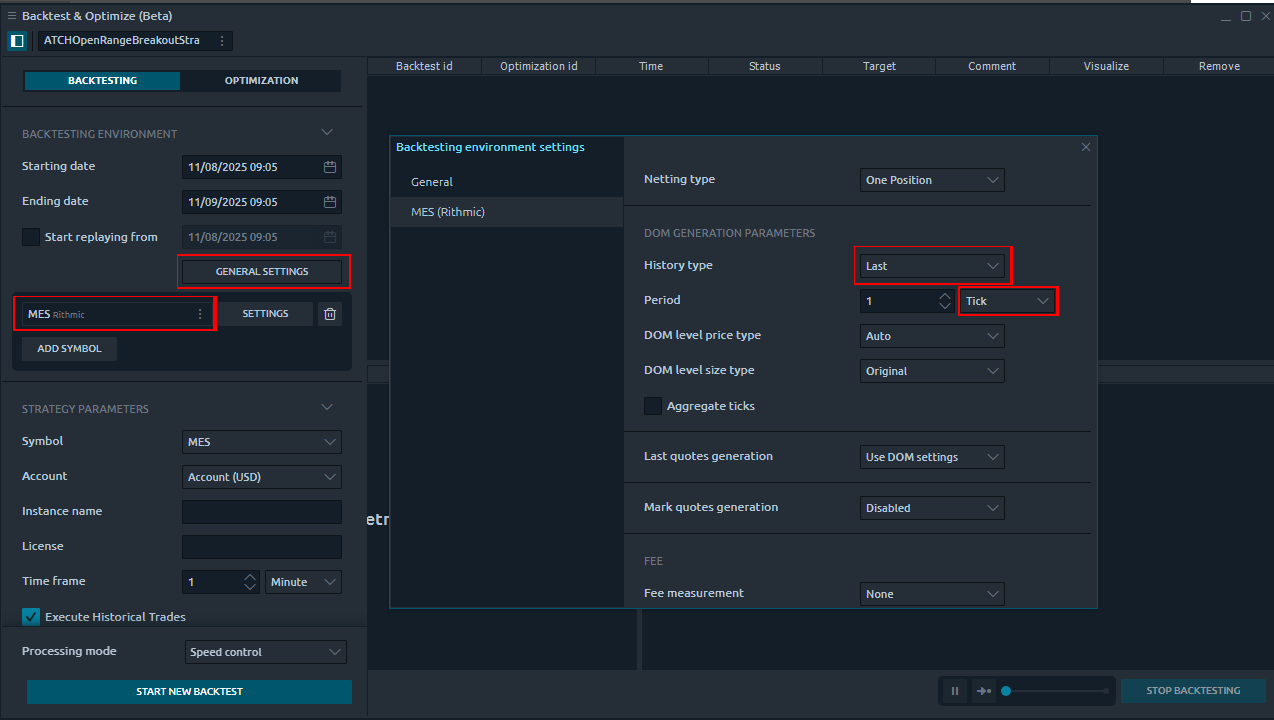
Select your symbol (e.g., MES) and click General Settings. Make sure History Type is set to Last and Period is set to Tick:
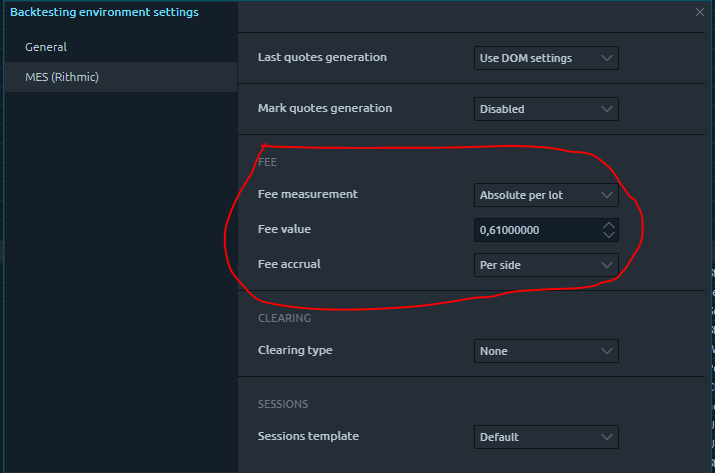
Finally, set the fees manually — for MES futures, use 0.61 as shown:
No performance reports have been uploaded for this strategy yet.
Download & Installation Instructions
License Requirements
At automated-trading.ch you can choose to either purchase a monthly subscription to use our premium products, or use our free products without subscribing.
In both cases, you need to create an account so you can get a License you can use for both premium and free products.
To obtain your license, simply sign up and then get your license on the billing page.
Download
You can also download this strategy — and every other automated-trading.ch strategy or indicator — anytime from your centralized Downloads page.
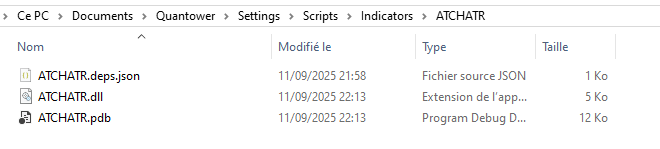
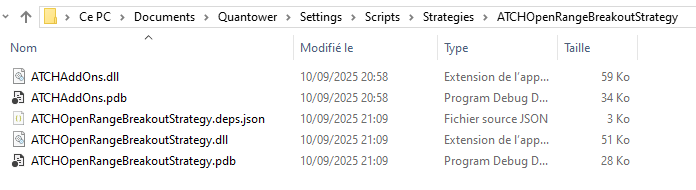
Installation Steps

Frequently Asked Questions
General
Billing
Skeptics
Release Notes
- - Compiled in .net 10 for compatibility with latest quantower versions
- - Fix Bug : Supertrend indicator waas not using historical prices prior to the starting of the strategy which made stoploss and take profit stale if strategy started at opening range time
- Fix Bug: Error when running multiple instances of the strategy; Fix bug: Null exception when managing positions
- Fix Bug: Trades open but strategy doesn't detect them because of different instrument name between simulation and real account; Fix bug: range is finished forming but trade setup is initialized on bar later
- Fix Bug: Setup Closed on each tick making the strategy reset in an infinite loop
- First Release of the strategy